Tools
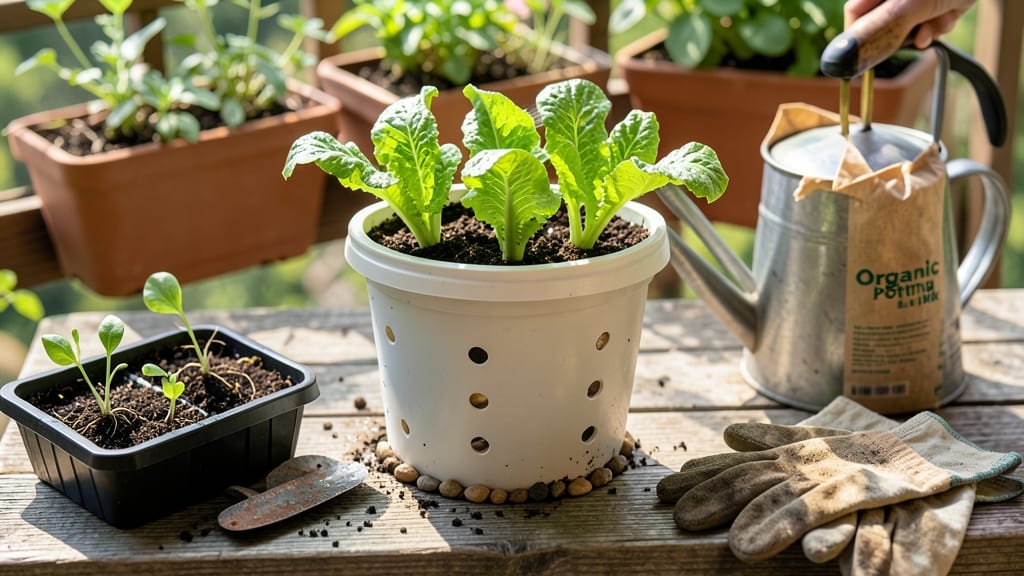
Bucket gardening 101 is your gateway to turning empty spaces into lush green oases—no yard required.
Picture this: a tiny balcony bursting with fresh basil, crisp lettuce, or even juicy tomatoes, all thriving in repurposed buckets 🌱. Whether you're crammed in an apartment or just want a low-maintenance garden, this method makes growing plants easier than you think.
I’ll walk you through the essentials—from picking the right containers and soil to mastering watering and troubleshooting common mistakes. No green thumb? No problem. By the end, you’ll have a thriving bucket garden that’s both productive and pretty.
Ready to dive in? Let’s get your first plants planted in 5 simple steps—no confusion, no wasted money, just fresh harvests in 60 days or less.
Bucket gardening 101: must-have tools and containers for beginners
Bucket gardening is one of the easiest ways to grow plants in small spaces, and the right containers and tools make all the difference. Whether you're growing herbs on a balcony or tomatoes in a 5-gallon bucket, your setup determines success.
As a beginner, you don’t need fancy equipment—just the essentials to create a thriving micro-garden.
The key to bucket gardening is choosing the right container materials and ensuring proper drainage and aeration. Plastic buckets, fabric grow bags, and even repurposed containers can work, but each has unique benefits.
For example, 5-gallon buckets are affordable and widely available, while fabric pots allow roots to breathe better, reducing overwatering risks.
| Container Type | Pros | Cons | Best For |
|---|---|---|---|
| 5-Gallon Buckets | Durable, affordable, widely available | Can retain too much moisture | Herbs, lettuce, small veggies |
| Fabric Pots | Improves aeration, lightweight, reusable | Dries out faster, less sturdy | Tomatoes, peppers, deep-rooted plants |
| Plastic Bins | Lightweight, customizable sizes | Poor drainage if not modified | Seedlings, small plants |
| Grow Bags | Portable, breathable, reduces transplant shock | Less structural support | Succulents, strawberries, herbs |
| Ceramic Pots | Aesthetic, retains moisture well | Heavy, breaks easily, expensive | Decorative plants, small herbs |
Beyond containers, you’ll need a few essential tools to keep your bucket garden thriving. A drill with hole saw is a game-changer for adding drainage holes if your containers don’t have them.
Without proper drainage, roots suffocate, leading to root rot and fungal diseases. I always drill holes in the bottom and sides of my buckets to ensure excess water escapes.
Don’t overlook saucers or trays to catch runoff and prevent messes. Plastic saucers are ideal for indoor setups, while outdoor gardens benefit from elevated stands to improve airflow. A watering can with a rose attachment also helps deliver water directly to the soil without disturbing roots.
For larger setups, a hose with adjustable nozzle saves time and effort.
If you’re growing vegetables or heavy feeders like tomatoes, consider adding a support stake or trellis early on. Plants like cucumbers or pole beans thrive with vertical support, saving space and improving air circulation.
I’ve found that bamboo stakes or wire cages work best for most bucket gardens, as they’re lightweight and easy to secure.
For soil, avoid garden soil—it’s too dense and compacted. Instead, use a lightweight potting mix with perlite or vermiculite to improve aeration. A soil moisture meter is another handy tool to prevent overwatering, which is a common beginner mistake.
I check moisture levels daily during hot summers to ensure my plants get just the right amount of water.
Lastly, keep a small hand trowel and pruning shears on hand for maintenance. Trimming dead leaves and harvesting regularly encourages new growth. A spray bottle is perfect for delicate plants like basil or lettuce, while a gardening glove protects your hands from thorns or rough edges.
With these must-have tools and containers, you’re ready to start your bucket garden with confidence. Remember, the best setup is one that fits your space and plants—so don’t hesitate to mix and match containers or tools based on your needs! 🌱
Step-by-step bucket gardening setup: soil, drainage, and Plant selection
Ready to turn empty buckets into a thriving garden? The secret lies in proper soil prep, drainage solutions, and plant selection tailored for containers.
Unlike traditional gardens, buckets demand fast-draining mixes and space-conscious plants—but with the right approach, you’ll enjoy fresh basil, lettuce, or peppers in no time. Let’s break it down step by step to ensure your bucket garden starts strong.
First, sterilize your buckets to kill pests or diseases lurking from past use. A quick soak in 10% bleach solution (1 part bleach to 9 parts water) for 10 minutes does the trick. Rinse thoroughly and let dry completely before planting.
Skipping this step could introduce root rot or aphids before your seeds even sprout. Pro tip: Drill drainage holes in the bottom if they’re missing—this is non-negotiable for container gardening success.
- Wash buckets with soapy water and rinse
- Drill drainage holes (¼-inch diameter) in the bottom
- Sterilize with bleach solution (10% for 10 mins)
- Add a plastic liner (optional) to protect wood
- Add ½-inch gravel or broken pottery at the bottom
- Place a mesh screen to keep soil from clogging holes
- Fill ¼ of the bucket with drainage material
- Use lightweight potting mix (avoid garden soil)
- Add perlite or vermiculite (20%) for aeration
- Mix in compost (10%) for nutrients
- Fill bucket to 2 inches from the top
- Herbs: Basil, parsley, cilantro (5-gallon bucket)
- Greens: Lettuce, spinach, kale (3-gallon bucket)
- Peppers/Tomatoes: Dwarf varieties (7+ gallon bucket)
- Avoid large root systems (e.g., corn, pumpkins)
- Plant seeds ½-inch deep or transplant seedlings
- Water until soil is evenly moist (not soggy)
- Place in 6+ hours of sunlight daily
- Use a saucer to catch excess water
For soil mixes, avoid heavy garden soil—it compacts and suffocates roots. Instead, blend 60% potting mix, 20% perlite, and 20% compost to create a well-aerated, nutrient-rich medium. Add a slow-release fertilizer (like osmocote) at planting time to give your plants a 3-month nutrient boost.
If you’re growing peppers or tomatoes, opt for larger buckets (7+ gallons)—these plants need more root space to produce heavy yields.
Not all plants thrive in buckets. Stick to compact varieties like bush beans, dwarf tomatoes, or mini cabbage. These plants stay small enough for containers while still delivering big harvests.
For herbs, basil and thyme are bucket gardening superstars—they love full sun and regular watering but won’t outgrow their pots. Just remember: shallow-rooted plants (like lettuce) need frequent watering, while deeper-rooted plants (like peppers) prefer drier soil between waterings.
Once your plants are in place, monitor drainage closely. If water pools in the saucer after 30 minutes, your bucket may need more holes or a lighter soil mix. Overwatering is the #1 killer of bucket gardens—always let the top inch of soil dry out before watering again.
Place a moisture meter in your bucket to track water levels like a pro. With these steps, your bucket garden will be lush, productive, and pest-free in just a few weeks!
🌱