
Picking
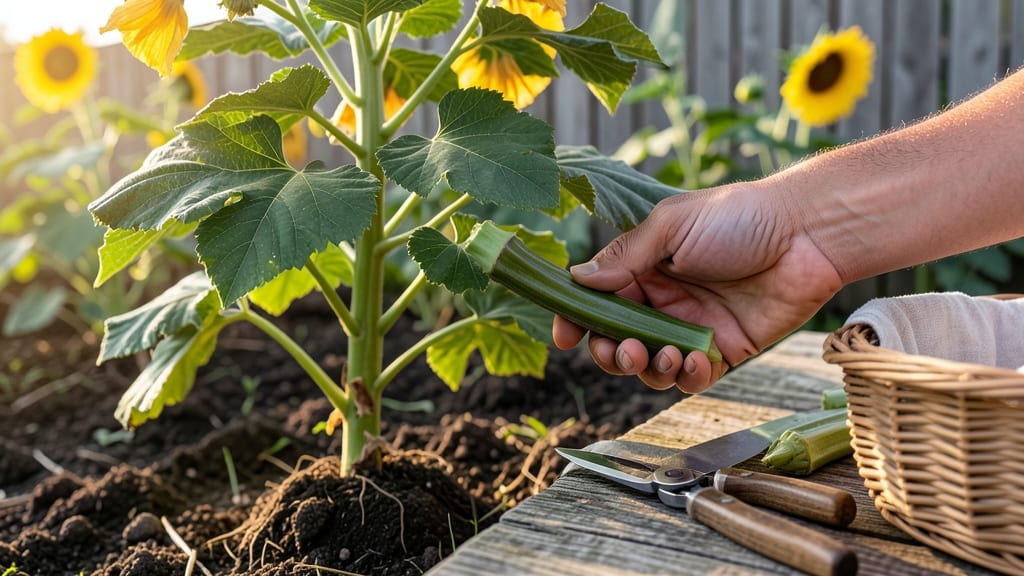
To pick okra from the garden at the perfect time means harvesting tender, flavorful pods every time—not the woody, seedy ones that sneak up when you blink.
Okra lovers know the difference between mealy, fibrous pods and tender, crisp ones—it all comes down to timing. Miss the window, and you’re left with overgrown pods that turn your gourmet dish into a chewy challenge.
But nail it, and you’ll enjoy a steady supply of bright green, 3-inch pods that shine in stir-fries, soups, or fried dishes.
Here’s the secret: okra pods are ready when they’re 2-3 inches long, firm to the touch, and snap easily when bent. Think of it like a countdown—wait too long, and the pods harden, while picking too early means smaller yields.
I’ll break down the exact cues, from color to texture, so you never guess again.
You’ll also learn how often to harvest for maximum production, regional tweaks for USDA Zone 6a growers, and why a daily check during peak summer months keeps your okra plants happy and productive all season long.


Okra pod size guide: exact measurements for optimal harvest time
Timing is everything when harvesting okra—picking too early means wasted potential, while waiting too long turns tender pods into tough, seedy messes. The sweet spot? 3-4 inch pods that are firm yet crisp.
This range delivers the best flavor and texture, whether you're stir-frying, grilling, or roasting. Let's break down the exact measurements and textures that guarantee peak harvests.
Your okra plant produces pods at an astonishing rate—sometimes 2-3 new pods per day during peak season. But not all pods are created equal. The 3-inch mark is where magic happens: pods are tender enough to eat raw (if you're adventurous) and firm enough for cooking.
At this stage, the seeds inside are still small, keeping the pod's texture delicate and flavorful. Use a ruler or tape measure for precision, especially if you're new to okra harvesting.
Here’s the golden rule: Never let pods exceed 4 inches. Beyond this length, the walls thicken, fibers develop, and the seeds bulk up—turning your okra into a chewy, mealy disappointment. Overripe pods also drain the plant's energy, reducing future yields.
Think of your okra plant like a high-yielding cash crop—you want consistent, quality harvests, not a few giant pods at the end of the season.
| Pod Stage | Size (Inches) | Texture | Taste & Use | Harvest Tip |
|---|---|---|---|---|
| Too Early | Under 2" | Soft, spongy | Bland, underdeveloped | Wait 2-3 days |
| Perfect | 3-4" | Firm, crisp | Sweet, tender, versatile | Harvest daily |
| Overripe | 5"+ | Woody, fibrous | Bitter, seedy, tough | Remove immediately |
Pay close attention to pod shape—ideal okra should be straight and cylindrical, not curved or bulbous. Curved pods often indicate uneven growth or nutrient deficiencies, which can affect texture.
If you notice this, check your soil pH (okra thrives at 6.0-6.8) and consider a balanced fertilizer like 10-10-10 to encourage straight, healthy pods. A quick soil test kit makes this easy to diagnose.
Texture is your secret weapon for perfect okra. Run your thumb along the pod—it should feel slightly resistant but still bend slightly (like a fresh green bean). If it snaps easily when bent, it’s ready now. If it bends without resistance, wait another day.
Overripe pods feel hard and woody, almost like a small tree branch. At this stage, the pod’s internal seed cavity expands, reducing edible flesh and increasing fiber content.
Pro tip: Harvest in the morning when pods are cool and crisp. This is when their starch content is lowest, making them sweeter and more tender. Avoid picking after rain—wet pods bruise easily and develop off flavors.
Always use clean, sharp pruners or garden shears to make clean cuts just above the pod’s base. This minimizes damage to the plant and encourages faster regrowth.
Regional variations matter! In hot, humid climates (like the Deep South), okra grows faster and larger, so you may need to harvest every 48 hours to stay ahead.
In cooler regions (like Zone 6b), pods mature more slowly—aim for 4-inch pods since they’ll naturally be firmer and less fibrous. Always adjust your harvest frequency based on your local climate and plant’s growth rate.
One common mistake? Ignoring the flowers. Okra plants produce yellow blooms before pods form. If you see new flowers daily, your plant is healthy and productive. But if flowers wilt without setting pods, it could signal stress from heat, drought, or poor pollination.
In this case, hand-pollinate by gently brushing flowers with a soft paintbrush to transfer pollen, or increase watering to reduce stress.
Remember: Consistent harvesting is key to a long, productive season. When you pick pods regularly, your okra plant redirects energy to producing more flowers and new pods instead of letting existing ones overripe. Aim to harvest 5-10 pods per plant weekly during peak season.
With this approach, a single okra plant can yield up to 20 pounds of pods over its lifetime—that’s 50+ servings for your family!
How to check okra ripeness: visual and tactile clues beyond size
When it comes to picking okra, size isn't everything. While a 3-4 inch pod is often the sweet spot, I’ve learned that color, texture, and even flower cues can tell you exactly when to harvest for the best flavor.
Ignoring these visual and tactile clues often leads to fibrous, seedy pods that ruin even the best recipes.
Start by examining the pod’s glossy sheen. Mature okra pods should have a bright, vibrant green color and feel slightly waxy to the touch. Dull or yellowing pods are a clear sign they’ve passed their prime.
I also check for firmness—press gently with your thumb; if it gives slightly but doesn’t feel mushy, it’s ready.
Don’t overlook the flower blooms on your okra plant. New flowers signal the start of the pod development cycle, and pods that form just after blooming are typically the most tender. If you see yellowing flowers still clinging to the plant, those pods are likely overripe and tough.
⚠️ Warning: Common Mistakes That Ruin Your Okra Harvest
- Picking too early (<2 inches): Pods won’t develop properly and may lack flavor.
- Waiting too long (>5 inches): Pods become woody, seedy, and tough.
- Ignoring texture: Soft or spongy pods indicate overripeness, even if they’re the "right" size.
- Harvesting in extreme heat: Pods can become bitter; pick in the morning for best results.
Pro Tip: Use a sharp pair of pruners to avoid damaging the plant. Always harvest with the stem attached to prevent disease.
Another trick I use is the snap test. Hold a pod between your fingers and gently bend it—if it snaps cleanly, it’s at peak ripeness.
A hollow sound or resistance means it’s overripe. This method works especially well for heirloom varieties like Clemson Spineless, which can vary in texture.
Regional differences also play a role. In hotter climates (like Zone 9-10), okra ripens faster and may need harvesting every 2-3 days to stay tender. Meanwhile, in cooler zones (like Zone 7), pods mature more slowly, giving you a longer window to monitor their development.
Finally, keep an eye on the pod’s growth pattern. If you notice pods curling or splitting, it’s a sign they’re ready to be picked immediately. These visual cues, combined with regular harvesting, ensure your okra stays crisp, sweet, and full of flavor all season long.