Picking
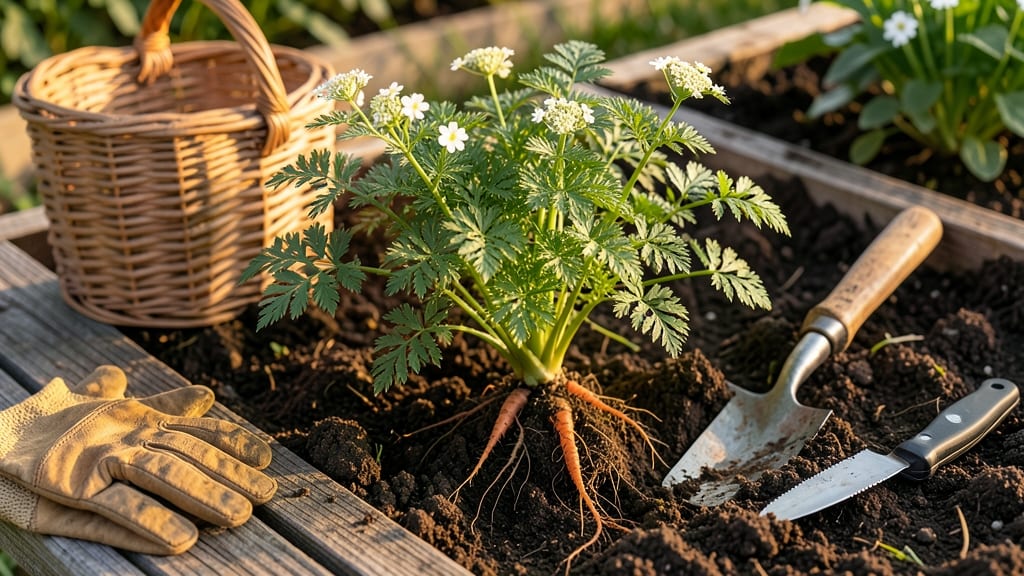
Harvesting carrots from your garden at the perfect time ensures sweet, tender roots 🥕 — and missing that window means tough, bitter, or split produce.
Pulled too early, your carrots will be tough and bitter—harvested too late, they’ll split and lose their sweetness. Timing is everything, and these simple soil checks will help you nail it every time.
Most varieties reach maturity in 70-80 days, but soil conditions, temperature swings, and even your finger pressure can shift that window. Below, I’ll walk you through the three key signs to watch for—plus how to handle mistakes when you miss the mark.
You’ll learn how to test for firmness, size, and color cues, when to avoid harvesting (like after frost or in extreme heat), and even how to store freshly pulled carrots for weeks. No more guesswork—just perfect, homegrown sweetness.


How to check carrot maturity using the 3-Finger soil test
Harvesting carrots at the perfect moment transforms your garden into a treasure trove of sweet, crisp roots. The 3-finger soil test is my go-to method for determining when carrots are ready—no guesswork required.
This tactile approach combines root size assessment, soil depth evaluation, and leaf maturity checks for foolproof timing. Whether you're growing standard orange varieties or heirloom purple types, this method works for all carrot types.
Before you dig, understand that carrots develop best in loose, well-draining soil with consistent moisture. The 3-finger test accounts for these growing conditions by measuring both root penetration depth and foliage development. When done correctly, you'll harvest carrots that are firm, sweet, and free from forking.
This method also helps prevent the common mistake of harvesting too late, which leads to split roots and reduced flavor.
Step-by-Step 3-Finger Soil Test for Carrot Maturity
- Step 1: Wait until foliage reaches 4-6 inches tall—this indicates the roots have had enough time to develop. Look for deep green leaves with a blunt stem end (not pointed). If leaves are still small or yellowing, wait 5-7 more days.
- Step 2: Gently brush away soil around the carrot's base to expose about 1 inch of the root. Use your fingers to feel for firmness and size. The root should be 1-2 inches in diameter (or your desired size for baby carrots). If it's smaller than your thumb, wait another week.
- Step 3: Insert three fingers vertically into the soil beside the carrot. Your fingers should reach the bottom of the root (about 6-8 inches deep for standard varieties). If your fingers hit resistance before reaching this depth, the carrot is ready—it’s hit the bottom of your container or hardpan.
- Step 4: Check skin color and texture. The carrot’s skin should be smooth and vibrant (orange, purple, or yellow, depending on variety). If the skin is rough or cracked, it’s overripe. Gently squeeze the root—it should feel firm but not hard. Soft spots indicate it’s past its prime.
- Step 5: Harvest in the morning when soil is moist but not soggy. Use a fork or hands to loosen soil around the root, then grip the foliage and pull gently. If resistance is strong, wiggle slightly—never twist, as this can cause forking. Shake off excess soil and store in a cool, dark place for up to 2 weeks.
For baby carrots, adjust your timing to harvest when roots reach ½ to 1 inch in diameter. These can be pulled as early as 50-60 days after sowing.
The 3-finger test still applies, but you’ll use your index finger alone to check depth—baby carrots rarely exceed 3 inches in length. This method ensures you harvest at the peak of sweetness before the roots become fibrous.
One common mistake is assuming all carrots mature at the same rate. Heirloom varieties like Purple Dragon or Danvers Half Long often take 5-10 days longer to reach harvest size compared to quick-maturing types like Nantes.
Always check the seed packet for days to maturity and adjust your 3-finger test accordingly. For example, if the packet says 70 days, start testing at day 65 to catch them at the perfect moment.
Extreme weather can also affect maturity. During hot, dry spells, carrots may mature faster due to accelerated growth. Conversely, cool, wet conditions can slow development.
Pay attention to your local frost dates—if your carrots aren’t ready by 2 weeks before the first frost, harvest what you can and prioritize pulling the largest roots first. Smaller carrots can be left in the ground and harvested later if protected with row covers.
After harvesting, resist the urge to wash carrots immediately. Dirt acts as a natural protector against spoilage. Store them in a perforated bag in the refrigerator for up to 3 weeks.
If you notice green shoulders (the leafy top turning green), this is normal and harmless—just trim it off before eating. The 3-finger soil test doesn’t just tell you when to harvest; it also ensures you’re getting the best flavor and texture from your homegrown crop.
Pro tip: Keep a harvest journal to track when your carrots reach maturity each season. Note the days to harvest, soil conditions, and weather patterns. Over time, you’ll refine your timing and even experiment with succession planting for a continuous harvest.
With practice, the 3-finger test becomes second nature, and you’ll never again pull carrots that are too tough or too woody.
Remember, the goal is consistent sweetness. When you master this test, you’ll enjoy carrots that are crisp, flavorful, and free from bitterness—the true reward of home gardening. Happy harvesting! 🥕
Signs of overripe vs. underripe carrots (and how to fix mistakes)
Knowing when your carrots are perfectly ripe means the difference between a sweet, crisp harvest and a tough, bitter disappointment. Overripe carrots become woody and split, while underripe ones stay small and pale.
The key is learning to read both visual cues and textural clues before pulling them from the soil.
Start by checking the top foliage. Healthy, ready-to-harvest carrots will have 4-6 inch tall green leaves with a slightly yellowish-green stem end. If the leaves are still short (under 3 inches) or have pointed green tips, your carrots need more time in the ground.
Conversely, if the leaves turn yellow or wilt, your carrots may already be overripe.
Texture is another dead giveaway. Gently squeeze the carrot just below the soil line—it should feel firm but slightly yielding, like a ripe pear. If it feels soft or mushy, it’s overripe and past its prime. Meanwhile, a hard, unyielding carrot is still underdeveloped.
Harvest Timing Guide
- Size: 1-2" diameter
- Color: Deep, even hue
- Texture: Firm with slight give
- Leaves: 4-6" tall, blunt stem
- Size: Under 0.5" diameter
- Color: Pale or uneven
- Texture: Hard and unyielding
- Leaves: Short (<3"), pointed green tips
- Size: Woody or split
- Color: Dull or cracked
- Texture: Soft or mushy
- Leaves: Yellowing or wilted
- Underripe: Wait 5-7 days, check soil
- Overripe: Use immediately or store
- Forked: Loosen soil before planting
- Split: Harvest earlier next time
Common harvesting mistakes like forked roots or cracked tops often stem from poor soil conditions. To prevent forking, amend your soil with compost or sand before planting—carrots need loose, stone-free dirt to grow straight.
If you notice cracks forming on the surface, your carrots are dehydrated; water deeply and harvest within 2-3 days.
For storage carrots, aim to harvest when they’re slightly underripe—they’ll sweeten during storage. Pull them when the shoulders are exposed (about 1/3 above soil) and let them cure in the sun for 1-2 hours before storing. This hardens the skin and extends shelf life.
If you’ve already harvested too late, don’t toss them! Overripe carrots can still be peeled and used in soups or stews, where their texture won’t matter as much. For future success, mark your planting dates and set reminders for 70-80 days after sowing, the ideal window for peak sweetness.