Tools
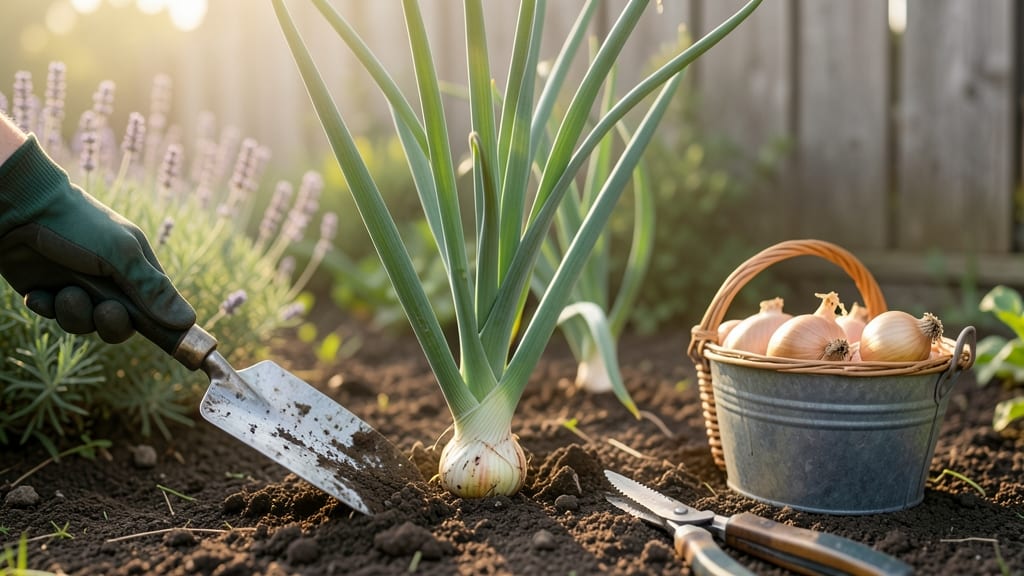
Pulling onions from your garden at the right time means the difference between tender, flavorful bulbs and tough, bitter ones that ruin your favorite dishes.
Picture this: you’ve nurtured your 🧅 onions all season, and now the tops are yellowing and flopping over. That’s your cue—but wait too long, and those perfect bulbs turn woody. Get it wrong, and you’ll end up with onions that taste more like regret than savory goodness.
Timing matters because onions mature at different rates depending on variety, weather, and soil conditions. Some need 90 days, others stretch to 120 days—and knowing when to pull ensures you harvest at peak perfection, not past it.
Here’s how to spot the ideal moment: three simple leaf tests, plus what to do once you’ve pulled them to keep them fresh for months. No more guesswork, just perfect onions every time.
3 Leaf tests to determine perfect onion harvest timing
Harvesting onions at the right moment transforms your garden into a flavorful treasure trove. The key lies in observing the leaves—they reveal exactly when your bulbs are ready. Unlike many vegetables, onions don't ripen after picking, so timing is everything.
I’ve used these three simple leaf tests for years, and they never fail to deliver perfectly sized, sweet onions every harvest season.
First, understand that onion tops change dramatically as bulbs mature. The fan test, neck test, and color test each offer unique clues. Mastering these will help you avoid two common mistakes: harvesting too early (small, pungent onions) or too late (woody, tough bulbs).
Let’s dive into each test so you can confidently pull onions at their peak.
🌱 3 Leaf Tests for Perfect Onion Harvest Timing
- 1. Fan Test: When tops flatten and fan out like a bird’s wings, bulbs are nearly ready. Look for 1-2 inches of dry neck between bulb and leaves.
- 2. Neck Test: Gently grasp the stem (neck) near the bulb. If it snaps easily with 1-2 inches of dry stem remaining, it’s harvest time. Less than 1 inch means wait.
- 3. Color Test: Healthy green tops turn straw-colored or yellow. The bulb skin should be papery and dry, not green or moist.
Pro Tip: Combine all three tests for 100% accuracy. A bulb passing two or more is definitely ready!
The fan test is my go-to because it’s the most visual. When onion tops transition from upright to a horizontal fan shape, it’s nature’s way of saying, “Pull me now!” This usually happens when bulbs reach 1.5–2 inches in diameter.
I’ve found that yellow onions often fan earlier than red or white varieties, so keep an eye on color differences between types.
Next, the neck test requires a little hands-on attention. The stem (neck) between the bulb and leaves should feel dry and brittle. If you gently twist it and it snaps cleanly with about 1–2 inches of dry stem remaining, that’s your cue to harvest.
This test works best in the morning when stems are firmest. I’ve learned the hard way that waiting until the neck turns brown and mushy means your onions have overstayed their welcome in the soil.
Don’t overlook the color test, which is especially useful for green onions or scallions. When the tops turn from vibrant green to straw-colored or yellow, the bulb below is ready. The skin should also feel dry and papery—not slick or moist.
For storage onions, this is the golden rule. If you see brown spots or mold on the tops, it’s a sign the bulb is rotting underground and should be pulled immediately.
Timing matters because onions stop growing once they’re pulled. Harvest too early, and you’ll get small, sharp bulbs that lack sweetness. Leave them too long, and they’ll become woody and pungent, perfect for caramelizing but terrible for fresh eating.
My ideal harvest window is late summer to early fall, typically 90–120 days after planting, but always trust the leaves over the calendar.
For green onions, the rules are slightly different. Harvest them when the scapes (flower stalks) appear or when the bulb is ½–1 inch wide. At this stage, the leaves should still be bright green and upright.
Cut them just above the soil line to encourage regrowth. I’ve harvested green onions every 3–4 weeks this way, and they keep producing all season long.
One mistake I see often is pulling onions by their tops. Always dig around the bulb with a fork or your hands to avoid damaging the neck. A clean break ensures your onions cure properly and store longer.
After harvesting, let them dry in the sun for 3–5 days to toughen the skin. This step is non-negotiable for long-term storage—skipping it leads to soft, rotting bulbs in just weeks.
Finally, remember that weather plays a role. If rain is forecast, harvest a few days early to prevent rot or mold. On the other hand, a dry, sunny spell is perfect for curing onions.
I’ve had the best luck harvesting on a warm, breezy afternoon when the air is dry. This gives the bulbs the ideal conditions to dry out evenly before storage.
Master these three leaf tests, and you’ll never again wonder when to pull onions from your garden. The difference between tender, sweet bulbs and bitter, woody disappointments comes down to paying attention to what the plants are telling you. Happy harvesting! 🌾
How to store freshly pulled onions for maximum freshness
Once you've pulled your onions at the perfect time, proper storage is key to preserving their flavor and texture. Freshly harvested onions need time to cure and dry before storage to prevent spoilage. Skipping this step can lead to moldy bulbs or soft, watery onions that spoil quickly.
Start by gently brushing off excess soil and debris from the bulbs. Avoid washing them unless absolutely necessary, as moisture speeds up spoilage. Let them air-dry in a shady, well-ventilated area for 2-3 days. This drying process helps thicken the skin, making it more resistant to rot.
After drying, trim the roots and tops to about 1 inch from the bulb. This reduces moisture loss and prevents the onion from sprouting or rotting. Store them in a cool, dark place with good airflow, like a mesh bag or open crate, to avoid humidity buildup.
⚠️ callout-warning
⚠️ Don't Store Onions Too Soon!
Pulling onions too early (when tops are still green) or storing them before they're fully cured leads to premature spoilage. Wait until 70-80% of tops yellow and fall over—this signals the bulbs are ready for harvest and storage. Storing damp onions triggers mold growth within days, ruining your entire harvest.
🌱 Pro Tip: Test bulb readiness by gently squeezing—if it feels firm and dry, it's storage-ready!
For long-term storage, keep onions in a cool (40-50°F) and dry environment with low humidity. A root cellar or pantry works best, but avoid refrigeration—this causes onions to sprout or shrivel. Store them away from potatoes or apples, as these release ethylene gas, which accelerates spoilage.
Check your stored onions monthly for spoilage. Remove any bulbs that feel soft, moldy, or develop sprouts or wrinkled skin.
Properly stored onions can last 2-6 months, depending on variety and conditions. Sweet onions like Vidalia store best for 2-3 months, while storage varieties like Yellow or Red last up to 6 months.
If you notice mold or rot during storage, act fast! Isolate affected onions immediately to prevent cross-contamination. Discard any bulbs with soft spots or foul odors, as these are signs of bacterial or fungal growth.
With the right care, your homegrown onions will stay fresh and flavorful all season long.