
Tools
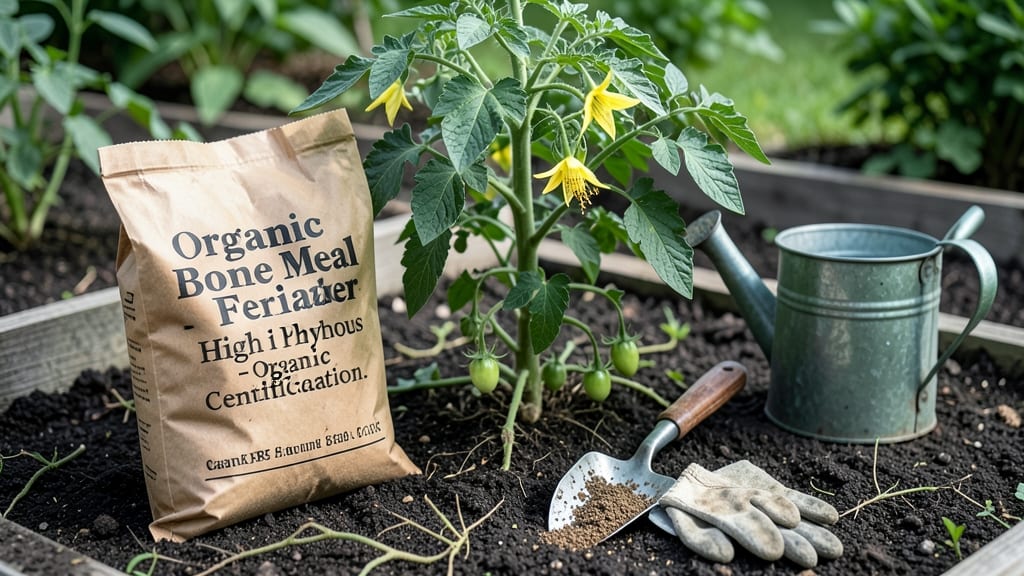
To use bone meal in your garden, mix it into the soil 2-4 inches deep before planting phosphorus-loving crops like tomatoes or roses 🌱 — it’s the fastest way to boost root and flower development.
Struggling with stunted root growth or weak flowering plants? Bone meal could be your secret weapon—this organic fertilizer delivers a rapid phosphorus boost that transforms soil health in weeks.
Unlike slow-release fertilizers, bone meal works quickly, making it perfect for transplanting or when you need a fast nutrient kick. Just sprinkle it into the planting hole or blend it into compost for even distribution.
In this guide, I’ll walk you through the best application methods, dosage rates, and timing to get the most out of your bone meal—without overdoing it.
When and how to apply bone meal for maximum root development
Bone meal is my go-to organic fertilizer for giving plants the phosphorus boost they need to develop strong roots and vibrant blooms. Unlike synthetic fertilizers, bone meal releases nutrients slowly, feeding plants over time while improving soil structure.
The key to success lies in timing and application—using it at the wrong stage can lead to wasted nutrients or even harm your plants.
I’ve found that bone meal works best when applied before planting or during early growth stages, especially for root vegetables and flowering plants. For example, mixing it into the soil when you plant tomatoes or roses gives their roots a head start.
But timing isn’t the only factor—dosage matters too. Too much can create an imbalance, while too little won’t deliver the benefits you’re after.
Here’s my proven method for applying bone meal, whether you’re working with vegetables, flowers, or even trees. The goal is to maximize root development without overdoing it. Let’s break it down step by step.
How to Apply Bone Meal for Strong Roots
-
Step 1: Choose the Right Time
Apply bone meal 2-4 weeks before planting or at planting time for the best results. For established plants, use it in early spring or fall to support root growth.
-
Step 2: Determine the Dosage
- Vegetables: 1 tablespoon per planting hole or 1 pound per 100 square feet
- Flowers/Perennials: 2 tablespoons per hole or 1.5 pounds per 100 sq ft
- Trees/Shrubs: ½ cup per young tree or 1 cup for established plants
-
Step 3: Mix with Soil or Compost
Work bone meal into the top 4-6 inches of soil using a garden fork or trowel. For compost, mix it in at a ratio of 1 part bone meal to 20 parts compost.
-
Step 4: Water Thoroughly
After applying, water the area deeply but gently to help nutrients dissolve and reach the roots. Avoid overwatering, which can wash away the fertilizer.
-
Step 5: Reapply as Needed
For heavy feeders like tomatoes or roses, reapply every 3-4 months. Avoid using bone meal more than twice a year to prevent phosphorus buildup.
When applying bone meal to vegetable gardens, focus on crops like carrots, potatoes, and onions, which need strong root systems to thrive. For flowering plants, bone meal encourages abundant blooms—just think of your roses or petunias bursting with color!
Even fruit trees benefit from a spring application, as it supports root expansion and fruit development.
One of my favorite tricks is using bone meal as a transplant booster. When moving seedlings into the garden, I mix a teaspoon into each planting hole to help them establish faster.
This works wonders for herbs like basil and peppers, which often struggle during the transition from pot to soil.
For container gardens, reduce the dosage to ½ teaspoon per 5-inch pot or 1 teaspoon per gallon container. Bone meal breaks down slowly, so a little goes a long way. Just be sure to wear gloves when handling it, as it can be dusty and may irritate sensitive skin.
Timing is everything with bone meal. If you apply it too late in the season, the nutrients may not have time to benefit your plants before dormancy. Conversely, applying it too early in spring might not align with your plants’ active growth phases.
Always check your local frost dates and plant your bone meal application accordingly.
Finally, remember that bone meal is just one part of a balanced garden strategy. Pair it with compost or compost tea for extra nutrients and mulch to retain moisture. Over time, you’ll see healthier roots, more vigorous growth, and plants that practically glow with vitality.
🌱
Best plants that thrive with bone meal fertilization
If you're looking to boost root development and flowering power in your garden, bone meal is your go-to organic fertilizer. This phosphorus-rich amendment works wonders for plants that need strong roots and abundant blooms.
The key is knowing which plants respond best and how to spot when they're craving more phosphorus.
Phosphorus deficiency often shows up as purple stems or slow growth, especially in plants that are heavy feeders. Bone meal provides that critical phosphorus boost to turn struggling plants into thriving powerhouses. Let's explore the top performers and how to recognize their needs.
Here are the best phosphorus-loving plants that will reward you with vigorous growth when you use bone meal:
| Plant Type | Phosphorus Need | Application Tip | Deficiency Signs |
|---|---|---|---|
| Tomatoes | High (for roots & fruit) | Mix 1 tbsp per hole at planting | Purple undersides on leaves |
| Peppers | High (for flowering) | Side-dress when blooms appear | Slow fruit set, weak stems |
| Roses | Very High (for blooms) | Work 1 lb per bush into soil | Stunted buds, purple foliage |
| Fruit Trees | Moderate (for root growth) | Apply 1 cup per tree at planting | Leaf discoloration, poor fruiting |
| Bulbs | Critical (for blooms) | Mix 1 tbsp per bulb at planting | No flowers, weak shoots |
| Carrots | Moderate (for root dev) | Broadcast 1 lb per 100 sq ft | Forked roots, slow growth |
For tomatoes and peppers, bone meal helps produce stronger root systems that support heavier fruit loads. The phosphorus also encourages more blooms, which means bigger harvests.
I've noticed my tomato plants develop deeper roots when I add bone meal at planting time, leading to plants that stay upright even when laden with fruit.
When it comes to roses and fruit trees, bone meal is practically a miracle worker. Roses especially love the phosphorus boost, which translates to more abundant and longer-lasting blooms. For fruit trees, applying bone meal at planting helps establish a strong root system that supports years of productive growth.
Don't forget about bulbs and root crops like carrots. These plants rely heavily on phosphorus for their below-ground development. A little bone meal mixed into the soil at planting time can make all the difference between scraggly roots and perfectly shaped vegetables.
Watch for purple stems or slow growth—these are clear signs your phosphorus-loving plants need a boost. With bone meal, you'll see healthier plants that produce more flowers and better-quality fruits and vegetables.