Fertilization
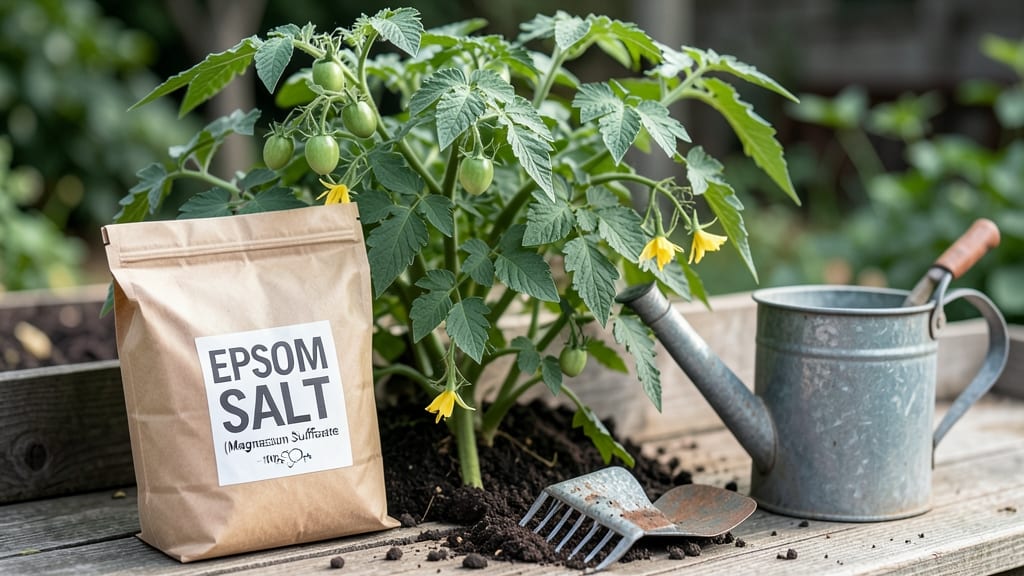
Using Epsom salt in your garden could turn weak, yellowing plants into vibrant, thriving 🌱 powerhouses—with just a few simple steps.
Picture this: You’ve spent hours nurturing your garden, only to watch your plants struggle with pale leaves, weak stems, or poor blooms. The fix might be simpler (and cheaper) than you think.
Epsom salt, a common household staple, packs a punch for magnesium-deficient soil, helping plants absorb nutrients more efficiently and even deterring pests.
Magnesium is the backbone of chlorophyll, the green pigment that fuels photosynthesis. When your plants lack it, you’ll see yellowing between leaf veins—a classic sign they’re crying out for help.
Epsom salt delivers that missing nutrient directly to the roots or leaves, giving your garden the boost it needs without the hassle of synthetic fertilizers.
In this guide, I’ll walk you through exactly how to use Epsom salt—whether you’re sprinkling it into the soil, spraying it on leaves, or mixing it into a DIY garden tonic.
You’ll also discover which plants benefit the most, how often to apply it, and when to skip it entirely. Let’s get your garden growing stronger than ever.
How Epsom salt boosts plant growth: science-backed benefits for your garden
If your garden plants are showing signs of stunted growth, yellowing leaves, or weak stems, Epsom salt might be the simple solution you’ve been missing. This common household item is packed with magnesium and sulfur, two essential nutrients that many garden soils lack.
Unlike synthetic fertilizers, Epsom salt dissolves quickly in water, making its nutrients immediately available to plants. The magnesium in Epsom salt plays a crucial role in chlorophyll production, which is the green pigment that helps plants convert sunlight into energy.
When plants don’t get enough magnesium, they struggle to produce enough chlorophyll, leading to interveinal chlorosis—where leaves turn yellow between the veins while the veins stay green. This deficiency is especially common in acidic soils or when plants are under stress from overwatering or drought.
Sulfur, the other key ingredient, supports protein synthesis and enzyme activation, which are vital for overall plant health and disease resistance.
Epsom salt isn’t just a quick fix for deficiency symptoms—it also enhances nutrient absorption and improves the structure of your soil. When applied correctly, it helps plants absorb other essential nutrients like phosphorus and nitrogen more efficiently.
This leads to stronger root systems, better flowering, and even larger, more flavorful fruits. For gardeners, this means healthier tomatoes, vibrant roses, and hardier peppers that produce more abundantly.
🌱
One of the most noticeable benefits of using Epsom salt is its ability to revitalize struggling plants.
For example, if your tomato plants are showing signs of magnesium deficiency, such as yellowing leaves between the veins, a foliar spray of Epsom salt can help them recover within a few weeks.
Similarly, pepper plants often respond well to Epsom salt by producing more vigorous growth and higher yields. Roses, another popular garden favorite, benefit from Epsom salt by developing brighter blooms and thicker stems.
Epsom salt is particularly effective for plants that thrive in sandy or acidic soils, where magnesium levels are typically low. If you’ve noticed your garden soil isn’t producing the results you expect, a simple soil test can reveal whether a magnesium deficiency is the culprit.
Even if your soil tests well, a light application of Epsom salt every few months can serve as a preventative measure to keep your plants healthy and thriving.
Beyond its nutritional benefits, Epsom salt also acts as a natural pest deterrent. The sulfur content helps repel common garden pests like aphids and spider mites, which are often attracted to stressed or nutrient-deficient plants.
By strengthening your plants’ natural defenses, Epsom salt reduces the likelihood of pest infestations, saving you time and effort in the long run.
However, it’s important to use Epsom salt correctly and in moderation. Overapplying it can lead to sodium buildup in the soil, which may harm beneficial microbes and plants over time.
Always follow recommended dosages—typically 1 tablespoon per gallon of water for foliar sprays or 1 cup per 100 square feet for soil applications—and avoid using it as a substitute for a balanced fertilizer.
🌿
If you’re ready to give your garden a natural boost, start by identifying plants that show signs of magnesium deficiency, such as yellowing leaves or weak stems.
Mix 1 tablespoon of Epsom salt into a gallon of water and apply it as a foliar spray or soil drench every 2-4 weeks during the growing season. Within a few applications, you’ll likely see improved growth, stronger stems, and more abundant blooms or fruit.
For the best results, combine Epsom salt with other organic amendments, like compost or worm castings, to create a balanced nutrient profile in your soil. This holistic approach ensures your plants receive the full spectrum of nutrients they need to thrive, while also improving soil health for long-term success.
☀️
Step-by-step guide: how to apply Epsom salt in your garden for maximum results
Epsom salt isn’t just for soaking sore feet—it’s a gardener’s secret weapon for boosting plant health. Packed with magnesium and sulfur, it helps plants produce chlorophyll, absorb nutrients better, and even improve flowering.
The key to success? Knowing how and when to apply it. Let’s dive into the best methods to transform your garden with this simple, affordable solution.
Before grabbing that box of Epsom salt, remember: less is more. Overuse can harm plants by disrupting soil chemistry. Start with small amounts and monitor your plants’ response.
Whether you’re dealing with yellowing leaves, weak stems, or poor blooms, Epsom salt can help—but only if applied correctly. Let’s break down the proven techniques for maximum results.
How to Apply Epsom Salt: 3 Proven Methods
-
1
Soil Incorporation (Best for Root Boost)
Mix 1 tablespoon of Epsom salt per square foot of soil. Work it into the top 2-3 inches during planting or early spring. Ideal for tomatoes, peppers, and roses needing extra magnesium. -
2
Foliar Spray (Fast-Acting Fix)
Dissolve 1 tablespoon in 1 gallon of water. Spray leaves in the early morning or evening to avoid leaf burn. Perfect for houseplants, citrus trees, or flowering plants showing deficiency signs like yellowing between veins. -
3
DIY Root Drench (Targeted Treatment)
Mix 2 tablespoons in 1 gallon of water and pour directly onto soil around the plant’s base. Use this method for newly transplanted plants or those struggling with poor nutrient uptake. Apply every 4-6 weeks during the growing season.
Timing is everything when it comes to Epsom salt. For best results, apply it during the early growing season (spring) to give plants a nutrient head start. Another critical window is during flowering and fruiting stages, when plants demand more magnesium.
Avoid applying it in winter or when soil is frozen, as plants won’t absorb it effectively.
If your plants show signs of magnesium deficiency, like yellowing leaves with green veins or weak stems, act fast. A foliar spray can provide quick relief, while soil incorporation offers long-term benefits.
For container plants, reduce the dosage to 1 teaspoon per gallon of water to prevent over-fertilization. Always water thoroughly after application to help nutrients penetrate the soil.
Safety first! While Epsom salt is generally safe, overuse can harm plants by altering soil pH or causing salt buildup. Stick to the recommended dosages and monitor your garden closely. If you notice leaf browning or wilting after application, flush the soil with water immediately.
For organic gardens, Epsom salt is a great supplement, but always pair it with other soil amendments like compost or worm castings for balanced nutrition.
Ready to give your garden a magnesium boost? Start with one of these methods and observe how your plants respond. With the right approach, you’ll see greener leaves, stronger stems, and more abundant blooms in no time. Happy gardening! 🌱